17 Feb 2014

Pathogen.vim without the Submodules: Use Infect

Over the weekend I finally admitted to myself that I hate submodules.

But they’re a keystone to one of my primary development tools: Vim. In order to use Vim, I use the Pathogen.vim plugin by @tpope. In order to use Pathogen, you normally use submodules in the .vim/bundle/ folder.

But submodules are the work of the devil.

I tried out the Vundle plugin and was seeing much longer loadtime for vim:

So I asked around on Twitter and @jwieringa advised me to checkout ‘infect’ by @crsexton .

And infect is awesome! It works with Pathogen to give it a declarative style for plugins. An example is:

"=bundle tpope/vim-pathogen
"=bundle tpope/vim-sensible
source ~/.vim/bundle/vim-pathogen/autoload/pathogen.vim
execute pathogen#incubate()

"=bundle mileszs/ack.vim
"=bundle vim-scripts/AutoTag
"=bundle kien/ctrlp.vim
"=bundle Raimondi/delimitMate
"=bundle sethbc/fuzzyfinder_textmate
"=bundle tpope/gem-ctags
"=bundle gregsexton/gitv
"=bundle sjl/gundo.vim
"=bundle tpope/vim-vinegar
"=bundle jnwhiteh/vim-golang
"=bundle wting/rust.vim

call pathogen#helptags()
set nocompatible      " We're running Vim, not Vi!
syntax on             " Enable syntax highlighting
filetype on           " Enable filetype detection
filetype indent on    " Enable filetype-specific indenting
filetype plugin on    " Enable filetype-specific plugins

Use it. Love it. Don’t look back!

If you want faster downloads with ‘infect’ try this unofficial fork of the standalone: https://github.com/zph/zph/blob/master/home/bin/infect. When I have time, I’ll work w/ @crsexton to get this added to ‘infect’.

15 Feb 2014

Finding myself in BSD

Blame smartOS not reading my SATA controller.

Blame Linux for not having first class support for ZFS (where my data is held).

Blame @canadiancreed for giving me a way out of the quandry.

The backstory is that I moved all of my backups to two ZFS pools a few years ago. I was running ZFSonLinux and it generally worked…. except when I rebooted the server and had to force import the pools.

Fast forward to that server being replaced by a workstation (i7 Haswell, 240GB Sata3 SSD, and 24GB RAM). I tried smartOS by Joyent and ran into issues with my SATA controller not being recognized. It’s a shame given how awesome the smartOS vm administration is. I mean vmadm and imgadm are light years ahead of Docker.

Since smartOS refused to recognize 3 of my 8 drives I ran back to Linux. The good new, Linux recognized the sata controller. The bad news, Linux couldn’t import the pools. Frankly, Linux had a hell of a time with building the ZFS on Linux kernel modules. I managed to piece together a few clues from the ZFSonLinux Issues on Github. In fact, thanks to @dajhorn for supplying answers on that Github issue which allowed me to build the kernel modules.

This sounds promising doesn’t it? It’s not, it was a horrorshow. Linux refused to import the one of the two zpools. One of them imported nicely, the mission critical financial records. The other semi-critical zpool was shot and refused to import under Linux.

I spent a whole evening banging my head against this issue. If it hadn’t been for Chris Reed I wouldn’t have hit upon the solution.

His recommendation was to try FreeBSD… so I did. And it recognized the SATA controller and also imported the zpools cleanly! So after a dry run w/ FreeBSD, I installed PC-BSD, which is a desktop variant based on FreeBSD. Think of it as the Ubuntu of the BSD world. And hell yeah, it’s all working :).

So far, I’m really liking it. Replace ‘aptitude’ with ‘pkg’ and it’s pretty similar. Except, PC-BSD is working where Linux & ZFS were a hassle.

15 Feb 2014

Solving Issues with RVM on BSD

RVM installation went poorly on FreeBSD.

The ca-certificates weren’t up to date according to the install script.

Really, the ca-certificates weren’t in the right location for RVM’s curl install script.

These commands as root fixed it:

mkdir -p /usr/local/opt/curl-ca-bundle
ln -s /usr/local/share/certs/ca-root-nss.crt /usr/local/opt/curl-ca-bundle/share/ca-bundle.crt

13 Feb 2014

Using Null Terminators in Linux/OSX

I ran into an issue with using xargs with rm -rf.

This could be dicey, so get your safety hats on.

The issue was that the filename included an apostrophe. So when trying to do a simple command such as tree -fi | grep conflicted | xargs rm -f '{}', I received an error about having an unterminated quote in the parameter.

Apparently, some versions of xargs allow you to specify a delimiter with a -d but the copy on my Mac didn’t have such a flag.

Instead, I learned that egrep --null will use a null character as the divider between matches. So the following solved my problem:

tree -fi | egrep --null conflicted | xargs -0 rm -f '{}'

Let’s break that command set down:

  • tree -fi is a trick I recently learned from my friend @olleolleolle. It prints out the local tree of files and the -fi prints out the whole filename (including directories).
  • egrep --null conflicted is where the magic starts. The --null flag tell egrep to separate matches with a null character.
  • xargs -0 rm -f '{}' this tells xargs that the null character is divider and to remove each filename that comes through the linux pipe.

This is yet another example of why I’m impressed with the commandline. Simple little tools that can be chained together with symbiotic behavior.

09 Feb 2014

Automating Email with Ruby

Last Friday was the kind of day where I dropped into a Pry repl in order to bang out an automation script.

The challenge was: automate the retrival of specific emails that contained receipts, wrangle them into sane data structures, and dump them into a spreadsheet with both daily totals and an absolute total.

An example email looked like this:

 Receipt #9999999999999


 County:Example, FL      Date: 2014-1-27 

 Name:Jill Doe
 Credit Card #XXXXXXXXXXXX9999
 Authorization code:999999

 No.of Pages viewed:3
 Total Amount: $ 3.00

 Thank you for visiting http://www.example.com  

First step was to build an email parser for this format. I tried to keep it tolerant of future changes to the email generation scheme.

The general steps involved are:

  1. Split the body linewise
  2. Create a method for each piece of content to extract.
  3. From the collection of lines, grep for the line with appropriate unique text.
  4. Then in that line, use a regex to find the specific portion of data.

The full code for that module is listed below.

module Email
    class Parser
      attr_accessor :email, :content
      def initialize(email)
        @raw_content = email.to_s
        @content = @raw_content.split("\n").map(&:strip)
      end

      def receipt
        content.grep(/receipt/i).first[/\d+/]
      end

      def county_line
        @county_line ||= content.grep(/county.*date/i)[0]
                                .split(/\W{3,}/)
                                .map { |i| Hash[*i.split(':').map(&:strip)] }
      end

      def county
        county_line.first["County"]
      end

      def date
        county_line[1]["Date"]
      end

      def name
        array = content.grep(/name/i).first.split(':')[1]
      end

      def credit_card_number
        content.grep(/credit card/i).first[/#.*$/]
      end

      def authorization_code
        content.grep(/authorization code/i).first.split(':')[1]
      end

      def pages_viewed
        begin
          content.grep(/pages viewed/i).first[/\d+/].strip
        rescue NoMethodError => e
          warn "#{e.message} for #{content.inspect}"
        end
      end

      def total_amount
        content.grep(/total amount/i).first
                                     .split(':')[1]
                                     .gsub(/\$/, '')
                                     .strip
      end

      def website
        content.grep(/visiting http/i).first[/http.*$/i]
      end

      def all
        ParsingPresenter.new(
          county: county,
          date: date,
          name: name,
          credit_card_number: credit_card_number,
          authorization_code: authorization_code,
          pages_viewed: pages_viewed,
          total_amount: total_amount,
          website: website,
          receipt: receipt
        )
      end
      def self.all(msg)
        ps = new(msg)
        ps.all
      end

    end

    ParsingPresenter = Class.new(OpenStruct)

With that in order, I set about using the awesome ruby-gmail gem for retrieving said emails. Note: after completing this project, I learned of a continuation of the ruby-gmail gem called gmail. All the code in these examples is specific to the older incarnation of the gem.

ruby-gmail has a simple interface for retrieving messages between date ranges. So I setup a specific Gmail filter for emails from a certain sender that included the text ‘receipt’.

There’s nothing too fancy in this code, but it’s important to set @gmail.peek = true so that programatically viewed emails aren’t marked ‘read’. Also of note is the use of Dotenv for setting secret values without risking them in a git repo.

 class Retriever

      USER = ENV['GMAIL_USER']
      PASSWORD = ENV['GMAIL_PASSWORD']
      LABEL = 'Receipts'

      attr_accessor :user, :password, :gmail, :messages
      def initialize(user=USER, password=PASSWORD)
        @user = user
        @password = password
        @gmail = Gmail.new(@user, @password)
        @gmail.peek = true
      end

      def message_count_in_range(start_date, end_date)
        #dates as '2010-02-10'
        gmail.inbox
             .count(:after => start_date, :before => end_date)
      end

      def emails_in_range(start_date, end_date, label=LABEL)
        #dates as '2010-02-10'
        gmail.mailbox(label)
             .emails(:after => start_date, :before => end_date)
      end

      def message_presenters_in_range(start_date, end_date)
        msgs = emails_in_range(start_date, end_date)
        @messages = msgs.map do |msg|
          Presenter.present(msg)
        end
      end

    end

    class Presenter
      attr_accessor :email
      def initialize(msg)
        @email = msg
      end

      def body
        email.body
      end

      def date
        email.date.to_date
      end

      def date_string
        date.to_s
      end

      def self.present(msg)
        presenter = new(msg)
        Message.new(date: presenter.date_string, body: presenter.body)
      end
    end

    Message = Class.new(OpenStruct)

The last task in building this tool was dumping the data to a CSV with totals by date as well as a grand total. The process is simple, pass in a collection of messages and iterate through them by date, add a subtotal per date, then add a final row with grand total.

I like to break out rows into their own methods when possible. In fact, were I to rewrite this code, the message row would have its own method to clean up the inner loop of messages_by_date(). Another trick that helped for testing was to not generate a file on the filesystem. CSV takes either an open or a generate method. With generate it will pass the complete csv file out as the return value!

class CSVBuilder
    attr_accessor :messages, :csv
    def initialize(messages)
      @messages = messages
    end

    def create
      @csv = CSV.generate do |csv|
        csv << header
        csv << empty_row
        uniq_dates.each do |date|
          messages_by_date(date).each do |msg|
            csv << [msg.date, msg.receipt, msg.authorization_code, msg.pages_viewed, msg.name, msg.credit_card_number, msg.total_amount]
          end
          csv << sum_totals_row(messages_by_date(date), "Subtotal for #{date}")
        end
        csv << empty_row
        csv << sum_totals_row(messages, "Total Amount")
      end
    end

    def header
      ['Date',
       'Receipt #',
       'Authorization Code',
       'Pages Viewed',
       'Name',
       'Credit Card #',
       'Total Amount']
    end

    def empty_row
      Array.new(header.count)
    end

    def messages_by_date(date)
      messages.select { |m| m.date == date }
    end

    def uniq_dates
      messages.map(&:date).uniq.sort
    end

    def sum_totals_row(msgs, label)
      rawsum = msgs.map { |m| m.total_amount.to_f }.inject(:+)
      sum = sprintf( "%.2f", rawsum )
      sum_row_padding = Array.new(header.count)
      sum_row = [ sum_row_padding, label, sum ].flatten
    end
  end

I’m also quite proud of the variable name rawsum because it’s rawsome to design code that will save a couple hours every two weeks.

With a good ecosystem of libraries, it’s only a couple hours of work to write a re-usable tool that saves significant amounts of time. Hooray :).
20 Jun 2013

Adventures with MRI 2.0.0 and Zlib: A Story of Malformed Gzips

It started off as a casual inquiry on Twitter:

And led to my friend @geopet posting the Minimum Viable Demo as a Gist:

And it was interesting

What we found out was that the Ruby open-uri library would make calls to an external API (Wunderground) and throw a Zlib::DataError when run in MRI Ruby 2.0.0. The strange thing was that MRI 1.9.3 works perfectly fine. Same exact story when the GET Request comes from Net/HTTP instead of open-uri. But it succeeds on 2.0.0 when using the RestClient Gem, as documented by @injekt.

The Gloves Come Off

We dove into the source of the error and determined that it was thrown from net/http/response.rb:357. In order to better understand the error, I sequentially placed binding.pry statements to determine where the error percolated to the surface. It was the call to @inflate.finish which was where the Zlib::DataError surfaced.

I left the code at this point and posted my initial findings back to Geoff and left the project alone.

Today

Then I saw this message and it was time for more digging :).

I started by forking his Gist and pulling it down to my local computer. My first phase of troubleshooting was to try alternate tools, in order to see how they dump the HTTP response. Good ol’ curl came to the rescue and provided me with the results that I placed in curl_response.txt and curl_raw.txt. Notice the rather interesting artifact around line 12 on the RAW version that isn’t present in the alternate curl response.

Pulling in Net/HTTP

It felt like progress and I wanted a better way to tweak the net/http library. I prepended the local directory to Ruby’s LOAD_PATH and copies the net folder out from MRI’s lib directory. Having the Dir.pwd prepended to the path enabled me to make very convenient testing tweaks to the Ruby Standard Library without needing to alter my standard RVM install :).

Tapping the Sockets

With net/http libs loaded from the local file, I was off to the races. I tapped into the internal workings by using the ‘sack’ utility sack for jumping directly into and editing ack results. With the addition of a strategically placed binding.pry, I was able to tap into the live socket info via a socket.read_all and write that out as a binary dump to socket_content.bin.

Reducing it to Elements

The last step in my troubleshooting was to create zlib_targeted.rb for isolating the zlib load issues from net/http. Since the underlying issue appears to be a malformed gzip returned from Wunderground’s API, I created zlib_targeted.rb to remove net/http from the equation. Check out the demo content of the file below:

Conclusion

Now we have a very narrowly tailored set of examples that dig into the exact errors, thanks to @geopet, myself, and @injekt.

For more info, see the comments in this Gist repo from @geopet: Initial Gist

Or my repo that includes the files described in this post: Full repo

I’m happy with how the toubleshooting has progressed and would like to see this issue resolved, whether it is a malformed response from Wunderground, intolerant behavior from MRI 2.0.0, or anything else.

02 Jun 2013

Don't fear pair programming - A Guide to Starting

Pair Programming is becoming a big deal in the Ruby programming world: this guide will help you get started.

Pre-Reqs:

General familiarity with Ruby tools (Bundler, Gems, RVM/Rbenv) Basic commandline comfort

What is Pairing?

In its simplest form, pair programming is where a pair of programmers work on a problem using the same computer.

Since I live don’t live in a technology hub in America, programming in the same physical location is challenging. Instead, it’s possible to replicate that experience with both parties in separate locations.

How Does it Work?

Setup a video call using Skype, Google Plus, Twelephone. Both partners connect into a shared machine such as a Virtual Private Server (VPS). Each partner connects into a shared Tmux session. Both of the individuals can jointly edit the same files, as if they were present at the same keyboard.

Setting It Up From Scratch

Signup with a VPS provider (I’m currently very happy with DigitalOcean) Boot up a basic 512MB RAM instance in the Linux flavor of your choice. I’ll use Ubuntu 12.04 x32 for this example. Once the instance is booted up, let’s connect and setup basic sane defaults. Install tmux and vim-nox using the package manager. Install Ruby using RVM, Rbenv, or Chruby. Install Tweemux Gem - gem install tweemux Now that we’ve laid the groundwork for it, let’s work on making it available for a partner.

Inviting a Pair

When ready to invite a pairing partner, we start by adding a unique user for them. For convenience, it’s best to add their username from Github.

adduser --disabled-password $PAIRNAME

Next we’ll use the Tweemux Gem from RKing to pull down the partner’s public key from Github, and add it to their ~/.ssh/authorized_keys.

tweemux hubkey $PAIRNAME

At this point in the process, that user can login to your server using the IP address, their Github username, and their matching private key.

ie - ssh $PAIRNAME@IP_ADDRESS_OF_SERVER

At this point, the host should fire up a shared Tmux session:

tmux -S /tmp/pair

And enable that socket to be world readable:

chmod 777 /tmp/pair

NOTE: Doing this on anything other than a bare server, or with someone you don’t trust, isn’t a secure or a good idea. Don’t do this on a production server or with sketchy folks!

Next, it’s time for the guest to join the shared Tmux session:

tmux -S /tmp/pair attach

And you’re both in the same Tmux session! The view, keyboard and such is all shared =).

26 May 2013

Buff - A Gem that Puts Muscle in the Buffer API

It’s Done! Buff is a Ruby Gem that wraps the Buffer API.

Why Write Buff Gem from Scratch?

Because the current Buffer Gem doesn’t have full coverage for the API. I started to update the Buffer Gem but quickly realized that I was spinning my wheels. I wanted to implement the gem as a set of layered abstractions and to be able to process the responses using Hashie::Mash. I envisioned a Gem where each response was a first class Ruby object, where each nested key could be called as a method.

I realized that it would be cleaner and more expedient to code from scratch: I spent the next few hours and produced a gem that had feature parity with Buffer’s existing gem:

Introducing Buff, the API complete Ruby Wrapper for BufferApp.com. Buff muscles Ruby into Buffer’s API.

Buff is RSpec tested, Webmocked, Travis CI’d, and easy to use.

Setbacks and Triumphs

It wasn’t all roses and perfume in the creation of this gem. Three setbacks stand out in my mind.

Webmock

I’ve previously used VCR for testing web APIs, but wanted to use a new system to build new skills. Webmocks are very pleasant to use and allowed the Specs to verify what API was contacted, along with testing the body content and return values.

HTTP Libraries

Buff Gem started with HTTParty , which was splendid while implementing the HTTP GET API methods. Once I began implementing the HTTP POST requests I started experiencing discomfort with using HTTParty. It’s a reliable library but I didn’t gel with the DSL for describing HTTP requests. Thankfully the HTTParty calls were wrapped inside the post and get methods in Buff::Client::Core.

Since the code was tested with Rspec and the post and get methods were abstracted, swapping out HTTParty for Faraday was merely a one hour setback.

What a wonderful confirmation that it’s valuable to wrap external library calls in an abstraction method inside your own library. This made dependency swaps much simpler.

Creating correct “application/x-www-form-urlencoded” Data

I expected to find a Standard Library tool for converting a nested Hash + Array object into www-form-encoded data. I was sorely disappointed, looking at you Addressable Gem, and spent hours trying to find an already coded solution.

After stepping back from the code for two days, I was explaining the problem to non-technical coworkers. In that moment, my subconscious presented the answer. I realized how easily I could write the transformation myself. I mentally coded it on the way home that afternoon and wrote it in bytes that evening. Here’s the implementation from Buff::Client::Encode:

Moral of the story : When stumped, back off and solve another problem. The subconscious is a useful ally. Hours of struggling could have been saved through patience and getting other things done.

What’s Next?

Since the Buff Gem provides greater coverage of the Buffer API than the existing Gem, it’d be awesome to see it replace Buffer Gem as the official Ruby Wrapper.

I feel great about completing a Gem with 100% coverage of an HTTP API :).

I’m considering writing a couple of small Buffer CommandLine tools for easy posting. If I have more steam, I’ll add an Alfred Workflow on top that allows posting to Buffer!

Want a Demo of Using Buff inside Pry?

If you work with Bufferapp and want to adopt this Gem as your Official Ruby Wrapper, that would be snazzy. Let’s talk: @_ZPH or Zander!

26 May 2013

Starting with Vim

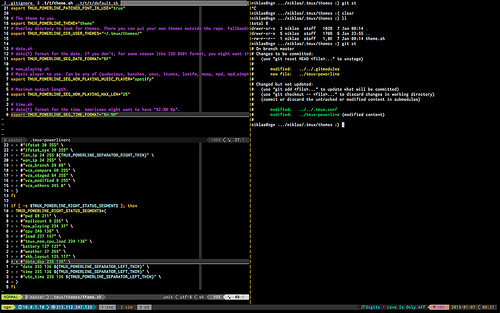
[caption id=“attachment_712” align=“alignleft” width=“500”] By: Niklas Gustavsson[/caption]

It’s been two lovely years with Vim and I’m sold! Vim’s the straight edge razor that slices through code. It’s like having a finely crafted and personalized lightsaber.

This post is aimed at getting a new Vim user up to speed without cutting off or wanting to sever their hands.

Getting Started

  • Use GVim or MacVim (avoid Terminal Vim until more proficient, then generally avoid GUI Vims)
  • Learn the Vim Modes
  • Learn survival tactics ala Progressive Vim
  • Learn to serenade this wild beast called Vim in its own language
  • Add plugins

I’ll assume that readers of my blog can install GVim or MacVim on their own. On OSX it’s as simple as using homebrew. On Linux, use the awesome package manager of your choice.

Vim Modes

Vim is a modal editor. You have three essential modes of operating:

  • Insert Mode (used for typing)
  • Visual Mode (used for selecting)
  • Command Mode (used for executing commands/movements)

Having three modes means that the keyboard can have 3x the number of functions because each key can have an alternate meaning in the various modes. For example, take the letter ‘i’:

  • In command mode, i places the user in insert mode
  • In insert mode, i types the letter i
  • in visual mode, it appears not to do anything (I could be wrong, but 10 secs of testing back me up)

The first thing to learn is a lesson from Douglas Adams: “Don’t Panic!”.

When lost in Vim or things are going wrong, mash ESC until you’re back in Command Mode.

When a file gets messed up because you’re unfamiliar with Vim, type ESC followed by :q! This will quit the file without saving changes (forced quit). If the changes are important, enter command mode with ESC and type :wq to write the changes to disk.

When you’re ready to type into the text file, type i to enter insert mode. At this point, typing will proceed as normal until you hit escape to leave insert mode.

Pat yourself on the back

You’re now as accomplished as I was for my first year of dabbling with Vim!

I didn’t realize how little of Vim I knew until I saw the surgeon’s precision with which Gary Bernhardt wielded Vim. As soon as I saw this I wanted more.

I took his advice and started paying attention to the language of Vim, which largely consists of unmodified alphabet keys and shifted alphabet keys. Learning some of these has made my typing DRASTICALLY more efficient. I now feel very little resistance when typing. It’s as if my thoughts are able to leap onto the screen without obstacles. It’s magic folks! And you too can cast these spells with enough time and effort.

But mastering Vim (or at least becoming proficient) is a longer topic than I can cover in this post. So let’s move on to discuss plugins and the .vimrc.

Vimrc

Let’s get this out of the way: Vim’s not terribly friendly with the default configuration!

So what’s the solution? .vimrc and Vim plugins.

The .vimrc file goes in your home directory, ie ~/.vimrc, and dictates Vim’s configuration. You can tweak the colorscheme, the timeoutlen, and just about anything from here. Here’s an example of what’s in my own .vimrc:

Plugins are re-usable Vim code that has grown too large to be included in the Vimrc. Plugins extend the functionality of Vim and can make it act more like an IDE. There’s currently a vibrant community of Vim users and a growing number of Vim plugins.

Here’s a list of My Current Plugins repo:

And here are the ones that I use daily:

ack.vim
ctrlp.vim
delimitMate
gundo
slimux
supertab
sweet-rspec-vim
vim-bundler
vim-commentary
vim-detailed
vim-dispatch
vim-endwise
vim-eunuch
vim-fugitive
vim-git
vim-numbertoggle
vim-powerline
vim-rails
vim-repeat
vim-rspec
vim-ruby
vim-ruby-refactoring
vim-surround

Hope this helps get someone started in Vim. It’s a very rewarding and sometimes frustrating journey.

I’d love to help my readers learn Vim! Let me know about your stumbling blocks and difficulties in the comments or on Twitter @_ZPH

06 May 2013

Travel Advice You Can't Afford to Miss

[caption id=“attachment_692” align=“alignleft” width=“500”]By: Frontierofficial By: Frontierofficial[/caption]

Traveling in a foreign country can be filled with wonder and excitement. It can also turn into a nightmare without the right preparation.

Travel Tips

  • Bring currency (US / UK / Euro) in decent quantities in small bills ($500+). This is emergency money for towns without ATMs.
  • Carry that currency distributed among various hiding places on your person and in your luggage. Consider getting extra hidden pockets sewn into some of your pants.
  • Wear easily washed clothing. Quick dry fabric is very convenient when forced to wash clothing in a hostel’s sink.
  • Bring all purpose liquid soap. I’m talking about hippie soap here like ‘Dr. Bronner’s’. It can be used for washing your body, your hair, and your clothing.
  • Keep only enough currency for a day or two in your wallet or purse. If someone pickpockets you, you’ve lost very little and have a story to tell.
  • Be skeptical of people who approach you. Some are great awesome people, others are hustlers. Learn the difference.
  • Be more trusting when you approach people. I made a habit of choosing my taxi drivers rather than choosing the ones who were overly interested in me.
  • Avoid the heavily touristed areas and densely populated areas. Pickpockets and scams will be more prevalent where a higher density of marks exists.
  • Withdraw currency from ATMs in well lit areas.
  • Use ATMs instead of currency exchangers. You’ll tend to get better rates.
  • Bring a good little flashlight and headlamp, especially when visiting areas without much infrastructure.
  • Shoot plenty of photos, especially of people and local vibrancy. Landscape photos won’t have the same staying power.
  • Write a journal or blog while traveling to share your experiences with those back home.
  • Contact your banks and credit card companies before leaving. Let them know the locations of your visit and the duration. This minimizes the risk that the cards will trigger fraud alerts while traveling.
  • Leave a photocopy of passport, credit cards and any other travel paperwork with a trusted friend or family member. Keep a second photocopy set in your luggage.
  • If you want or need connectivity while away, bring a GSM unlocked phone. In the US, a phone from AT&T that’s unlocked would be a decent choice.
  • Learn basic internet safety and use a VPN or SSH Tunnel for routing your data when on unknown internet connections. Better safe than hacked.
  • Consider using 2 Factor Authentication if you must use an Internet Cafe to log into your email. Even with this protection, try to avoid it.

What other travel tips have you used to make foreign travel a smoother process?

If you want to engage in Extreme Retirement Planning, living abroad on $600 - $1000 / mo and retiring early wouldn’t be too horrible ;) Especially with a remote job!